Hey Guys!
I'm so excited to announce Coco's first nail art tutorial! I absolutely love this. I think I'm going to try this out soon, so I hope you give this a try. And have fun! This is nail art, so you guys can be as creative as you want!
~Remember to Smile
I'm so excited to announce Coco's first nail art tutorial! I absolutely love this. I think I'm going to try this out soon, so I hope you give this a try. And have fun! This is nail art, so you guys can be as creative as you want!
~Remember to Smile
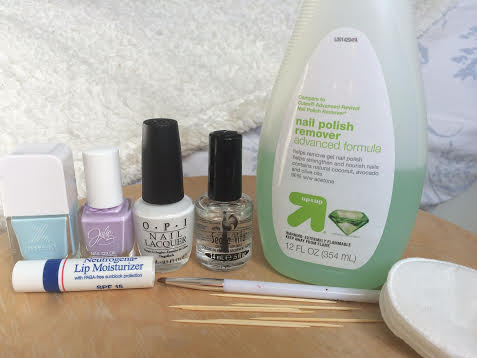
Supplies needed: white polish, at least one other color polish, top coat, chapstick (I have one specifically for water marbling), a small, short, stiff brush (mines a concealer brush), polish remover, toothpicks, and cotton pads
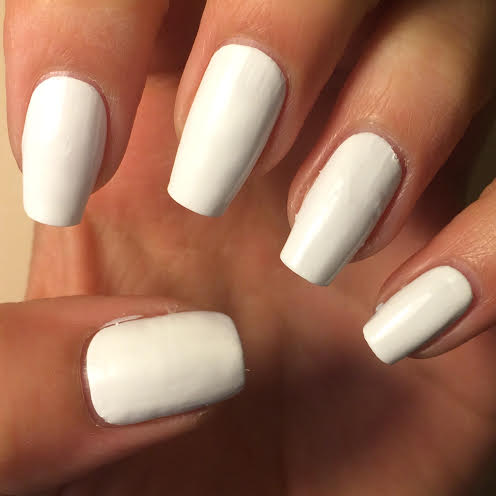
1. Paint your nails white. This is so when you put thin layers of color on top they appear more vibrant
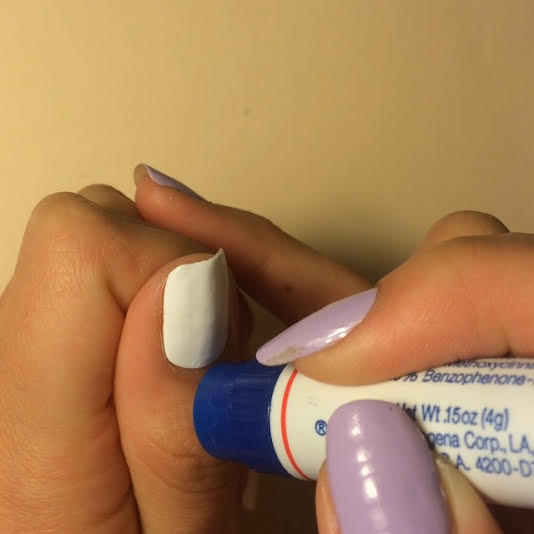
2. Put chapstick around the edge of the nail. This is to make the clean up process easier
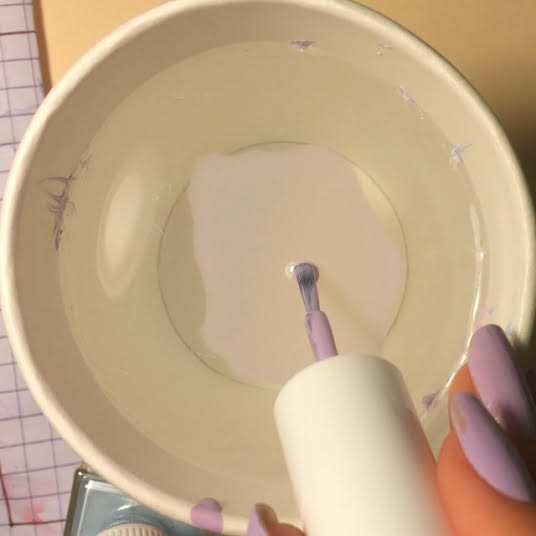
3. In a preferably disposable cup filled with room temperature water, gently put a drop of polish on the surface. If it doesn't spread, experiment with other colors. This works best with runnier polishes, not thicker ones
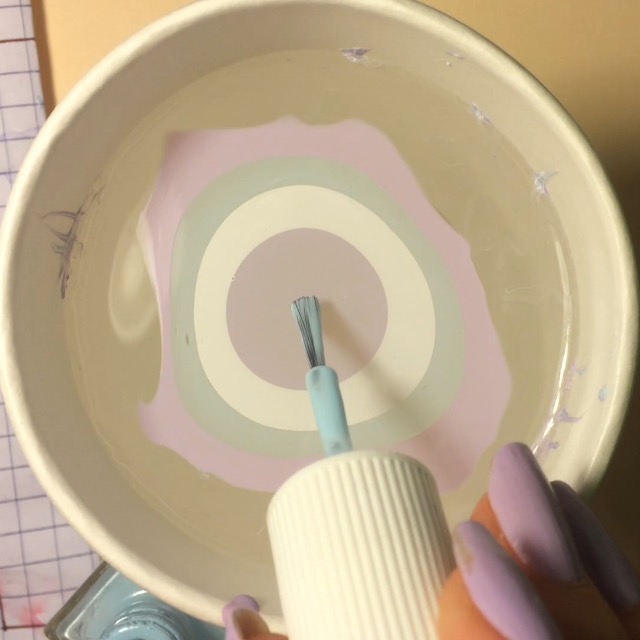
4. Keep dropping until you get the amount of rings you want. I normally do 4-8. Sometimes you can put multiple drops of the same color in a row if it's looking a little thin, but you shouldn't have to. Don't take too long doing this or it will dry up and you won't be able to do the next step
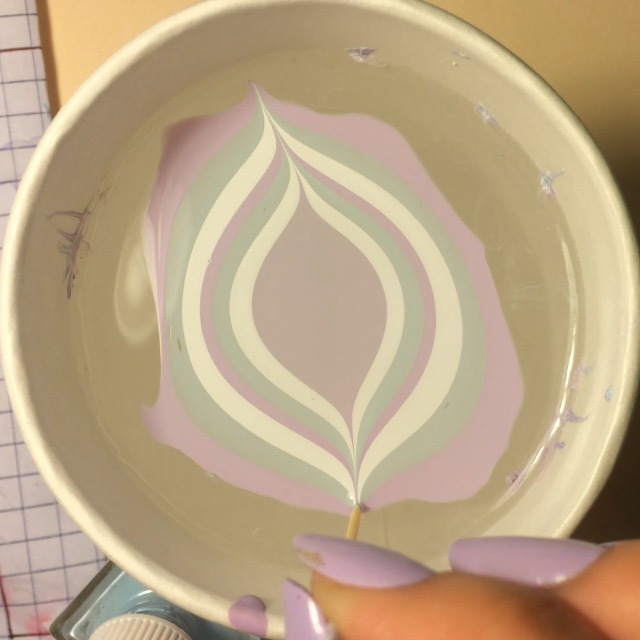
5. Use a toothpick to draw the middle out to the edge. You can make any design you want out of this, but I'm doing basic stripes
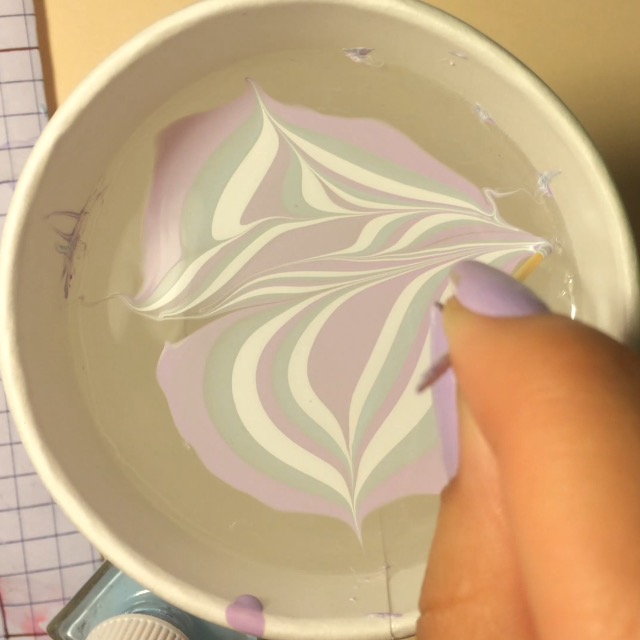
6. To make the stripe design, in particular, draw the left to right, right to left. It could take some practice to master this skill. Don't take your time doing this. This entire process should be done fairly quickly
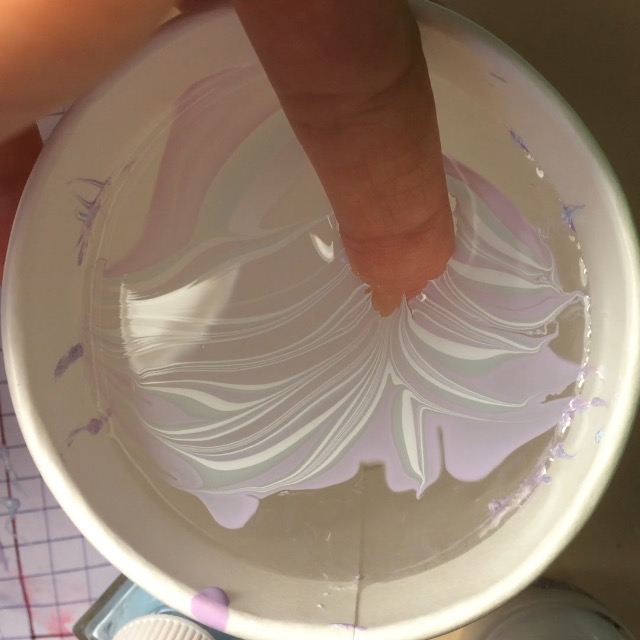
7. Once you're satisfied with your design, dunk you finger in. Don't worry about getting polish on your skin, that's what the chapsticks for. Don't take your finger out immediately, first blow on the surface to dry it a little, then, with your finger still submerged, use your toothpick to clear it out of the cup. Then take your finger out.
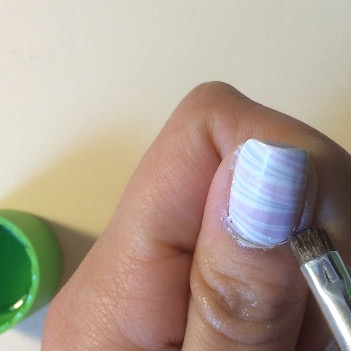
8. Use a cotton pad (or tissue it doesn't matter) soaked in polish remover to roughly go around cleaning up the polish on your skin that's not to close to your nail. Once that's cleared out, use the makeup brush dipped in remover and go along your cuticle, cleaning it off.
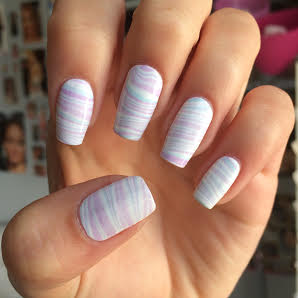
9. After letting it dry for a little while, apply a top coat to give it shine
Did you enjoy this article? Help spread the word! Tweet it, Pin it, Share it, Like it!
Thank you for taking the time to read this. I know this is cliched, but it actually means so much to me. Thank you so much my loves <3
Claimer: these photos belong to Coco. So if you want to use any of these pictures make sure to cite this website :)
